Openwrt Automatically Scanning for WiFi and Connecting as a Relay
I recently got hold of a very tiny router — an ultra-compact router built around the 25 x 25mm vocore development board, which, once cased, measures a mere 37.4 x 34 x 25.9mm, only slightly larger than a portable USB WiFi dongle. (link)
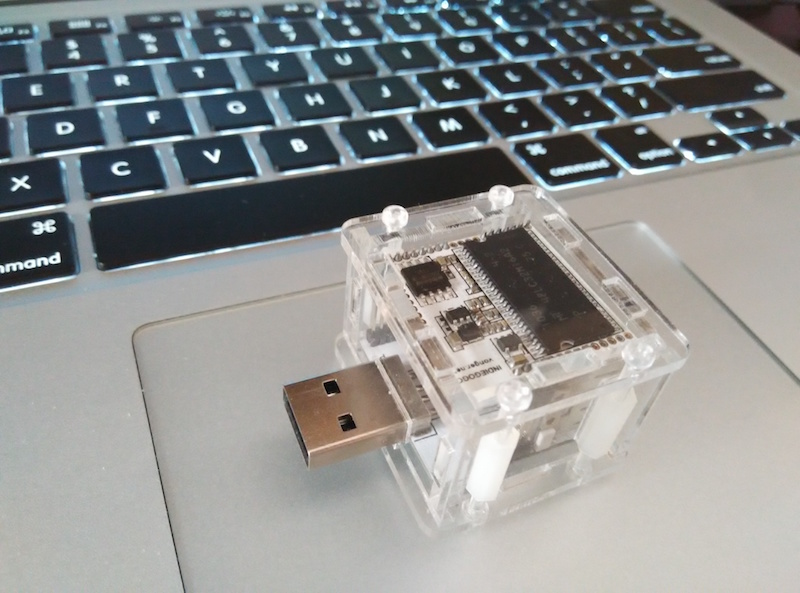 vocore router more
Despite being so small, the specs are actually quite decent:
CPU: Ralink RT5350 360MHz MIPS 24KEc
Memory: 32MB 133MHz SDRAM
Flash: 16MB
Expansion interfaces: SPI I2C I2S
WiFi: 802.11n
Ethernet: 10/100MHz x 2
GPIO expansion: 28 (Reused)
UART interface: UART Lite / UART Full
USB: USB 2.0, up to 480M
Power supply: 3.3V ~ 6V
Simply put, it lets us install Openwrt, which makes it much more fun to tinker with. And since it's so small and easy to carry around, it's practically perfect as a portable router. So without further ado, let's get started.
We all know that phones and laptops have this feature: if you've connected to a number of WiFi networks in various places before, the device remembers the relevant information, and when you return to that location, it automatically reconnects to the corresponding WiFi without any manual intervention (except for networks requiring authentication). So can Openwrt do the same thing? In other words, can Openwrt automatically scan for WiFi networks, connect to one automatically, and then broadcast a corresponding hotspot for phones or laptops to use?
Some people might wonder: if your router can scan for WiFi, surely your phone or laptop can too — so why not just connect directly instead of relaying through another device? For ordinary WiFi networks, that's indeed the case. But networks like our campus WiFi, or CMCC's WiFi, require authentication, and are typically tied to one account per device. The usual workaround is to connect a laptop to the WiFi and then broadcast it out, much like a portable WiFi dongle. Simple enough, but rather mundane, and besides, I don't always carry a laptop with me. So naturally, this approach wasn't for me.
Enough talk — let's get to work. My mini router is running Openwrt 15.05. First, here's the complete process for relaying an ordinary WiFi network (by "ordinary WiFi" I mean one where you just enter a password to get online). SSH into the router and enter:
#启动WiFi
uci set wireless.@wifi-device[0].disabled=0
uci commit wireless

#创建中继接口
uci set network.wwan=interface
uci set network.wwan.proto=dhcp
uci commit network

#创建热点WiFi
uci set wireless.@wifi-iface[0].device=radio0
uci set wireless.@wifi-iface[0].network=lan
uci set wireless.@wifi-iface[0].ssid=VoCore
uci set wireless.@wifi-iface[0].mode=ap
uci set wireless.@wifi-iface[0].encryption=none
uci commit wireless

#中继热点BoJone
uci add /etc/config/wireless wifi-iface
uci set wireless.@wifi-iface[1].device=radio0
uci set wireless.@wifi-iface[1].network=wwan
uci set wireless.@wifi-iface[1].ssid=BoJone
uci set wireless.@wifi-iface[1].mode=sta
uci set wireless.@wifi-iface[1].encryption=psk2
uci set wireless.@wifi-iface[1].key=12345678
uci commit wireless

#设置防火墙
uci set firewall.@zone[1].forward=ACCEPT
uci set firewall.@zone[1].network='lan wan wwan'
uci commit firewall

#重启网络
/etc/init.d/network restart
These steps are configured the first time you run this. Once set up, if you want to change which WiFi is being relayed, you only need to change the relay section — nothing else needs to change. Next, let's work step by step toward our goal. First is scanning the list of available WiFi networks. On Openwrt, this is done with:
iw wlan0 scan
This gives a fairly detailed list of nearby connectable WiFi networks, including SSID, signal strength, and so on. To keep the relay stable, we also need to assess the signal strength for the relay. The basic tool for this whole process is regular expressions.
Next, we need to implement automatic authentication. Here I've only automated the authentication process for our university's (SCNU) campus WiFi. Analyzing the process, I found that it simply posts the username and password — quite simple. But what tool should be used to do the posting? My first instinct was Python's requests library, but installing Python plus requests felt like overkill. Later I discovered that wget actually supports posting data too (amazing!), so I could just use wget directly. However, the built-in wget doesn't support HTTPS, so you need to run:
opkg update
opkg install wget
to install the full version of wget. With that, we can write the following shell script:
#!/bin/ash
POST_SCNUNET()
{
while true
do
web=`wget http://kexue.fm -q -O-`
net_test=`echo $web|grep Scientific`
if [ ${#net_test} -lt 2 ] ;
then
url=`echo $web|awk -F "href=\'" '{print $2}'|awk -F "\'" '{print $1}'`
url=${url/index.jsp?/userV2.do?method=login¶m=ture&}
wget $url --post-data 'username=XXXXXX&pwd=XXXXXX' --no-check-certificate -q -O-
sleep 5
else
break
fi
done
}
uci delete wireless.@wifi-iface[1]
wifis=`iw wlan0 scan`
dbm=`echo $wifis|awk -F 'BoJone' '{print $1}'|awk -F '-' '{print $NF}'|awk -F '.' '{print $1}'`
if [ $dbm -lt 100 ] ;
then
uci add /etc/config/wireless wifi-iface
uci set wireless.@wifi-iface[1].device=radio0
uci set wireless.@wifi-iface[1].network=wwan
uci set wireless.@wifi-iface[1].ssid=BoJone
uci set wireless.@wifi-iface[1].mode=sta
uci set wireless.@wifi-iface[1].encryption=psk2
uci set wireless.@wifi-iface[1].key=12345678
uci commit wireless
/etc/init.d/network restart
echo 'Connected BoJone' > log.txt
else
dbm=`echo $wifis|awk -F 'SCNUNET' '{print $1}'|awk -F '-' '{print $NF}'|awk -F '.' '{print $1}'`
if [ $dbm -lt 100 ] ;
then
uci add /etc/config/wireless wifi-iface
uci set wireless.@wifi-iface[1].device=radio0
uci set wireless.@wifi-iface[1].network=wwan
uci set wireless.@wifi-iface[1].ssid=SCNUNET
uci set wireless.@wifi-iface[1].mode=sta
uci set wireless.@wifi-iface[1].encryption=none
uci commit wireless
/etc/init.d/network restart
POST_SCNUNET
echo 'Connected SCNUNET' > log.txt
else
uci commit wireless
/etc/init.d/network restart
echo 'No Wifi Connected' > log.txt
fi
fi
What this script does is: scan the list of WiFi networks to see if BoJone is present and check its signal strength; if it's strong enough, connect to it automatically. If not, check whether SCNUNET is present and how strong its signal is; if strong enough, connect to it automatically and complete the authentication (the authentication process has already been analyzed in advance and is written into the POST_SCNUNET function — this function first uses wget to download this website to check whether the network is working; if it is, no authentication is needed, and if not, it will automatically redirect to the authentication page). If neither is available, then relaying is skipped, and we just wait for a wired connection.
Other campus networks or authenticated WiFi networks are probably similar in nature; this is just meant as a reference example.
Finally, a bit of a reflection: implementing simple functionality purely with shell scripts is quite satisfying, especially in low-end environments like routers — if shell can do the job, might as well stick with shell. With a foundation in Python programming, this kind of implementation isn't too difficult at all.
Translated automatically with claude-sonnet-5; all equations are reproduced verbatim from the source. Copyright remains with the original author.