Building a Portable Bypass Router with the Raspberry Pi Zero 2 W
A while back I got hold of a very compact dev board, the Raspberry Pi Zero 2 W (hereafter "Pi"), together with a USB Key adapter board. I spent a few days tinkering with it to build a portable bypass router. This post records the key technical points, for readers with similar needs.
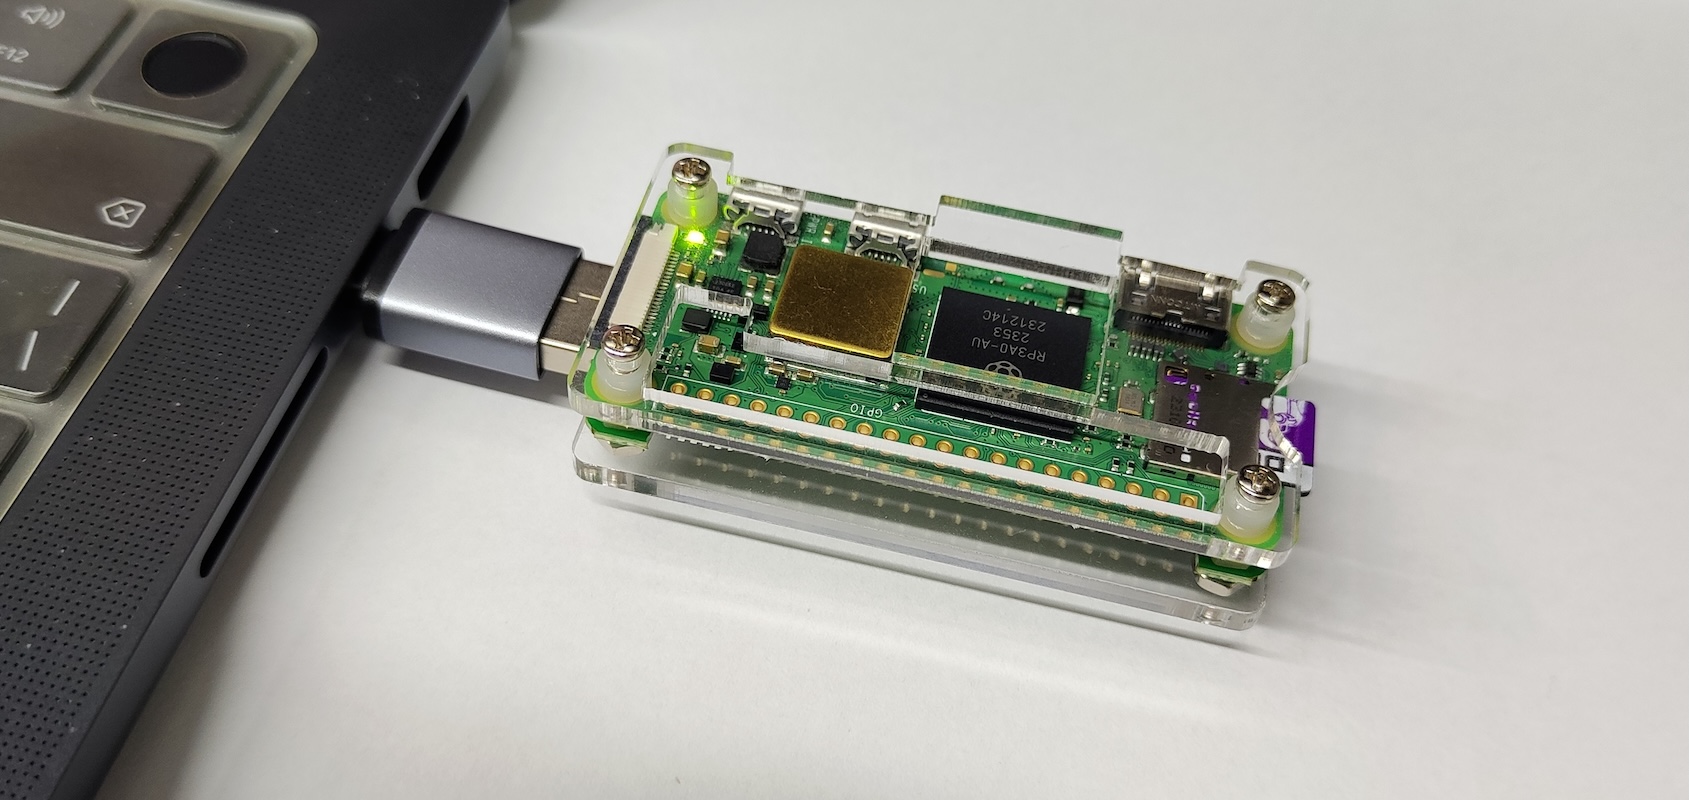 Raspberry Pi Zero2Wmore
Background
If you've dabbled with proxies before, the concept of a "bypass router" should be familiar — here we're mainly using it as a transparent proxy. The relevant technology is now quite mature, so setting up a transparent proxy is not particularly hard once you have a small host machine. The main focus of this post, however, is "portability", which requires the small host to satisfy the following properties:
1. Compact (otherwise it's not suitable for carrying around);
2. Wi-Fi connectivity;
3. Ability to switch networks at any time.
The tricky part here is point 3. Suppose I bring my laptop and the small host to a new environment, and I know the local Wi-Fi username and password — how do I get the small host to connect to the new Wi-Fi? The key issue is: before the small host is on the network, how does the laptop connect to it in the first place? If there's an Ethernet port, you could just use a cable, but hosts with Ethernet ports tend not to be small, and carrying an Ethernet cable around is cumbersome too (and a MacBook needs a dongle for it anyway).
The Raspberry Pi Zero 2 W plus a USB Key is a perfect fit for this requirement! It can run as a full host while also emulating a network card, so that when connected to a computer via USB, it both powers the Zero 2 W and establishes a direct channel between the Zero 2 W and the computer — letting us connect to the Pi without going through Wi-Fi at all.
Flashing the Image
In fact, this scheme of connecting directly to a Pi Zero via USB has been around for a while — for example, the tutorial Raspberry Pi Zero USB/Ethernet Connection Configuration Guide (macOS) dates back to 2018. However, the configuration method described there is now outdated, so here I'll update it with the latest approach that works, with help from K2.
First, prepare an SD card and flash the latest Raspberry Pi OS image onto it. The official Raspberry Pi Imager now makes flashing much simpler. A couple of details to watch out for when flashing the image: you must configure the Wi-Fi username and password (this can be changed later, but the first-time setup requires Wi-Fi), and you must enable SSH. Adjust everything else as needed:
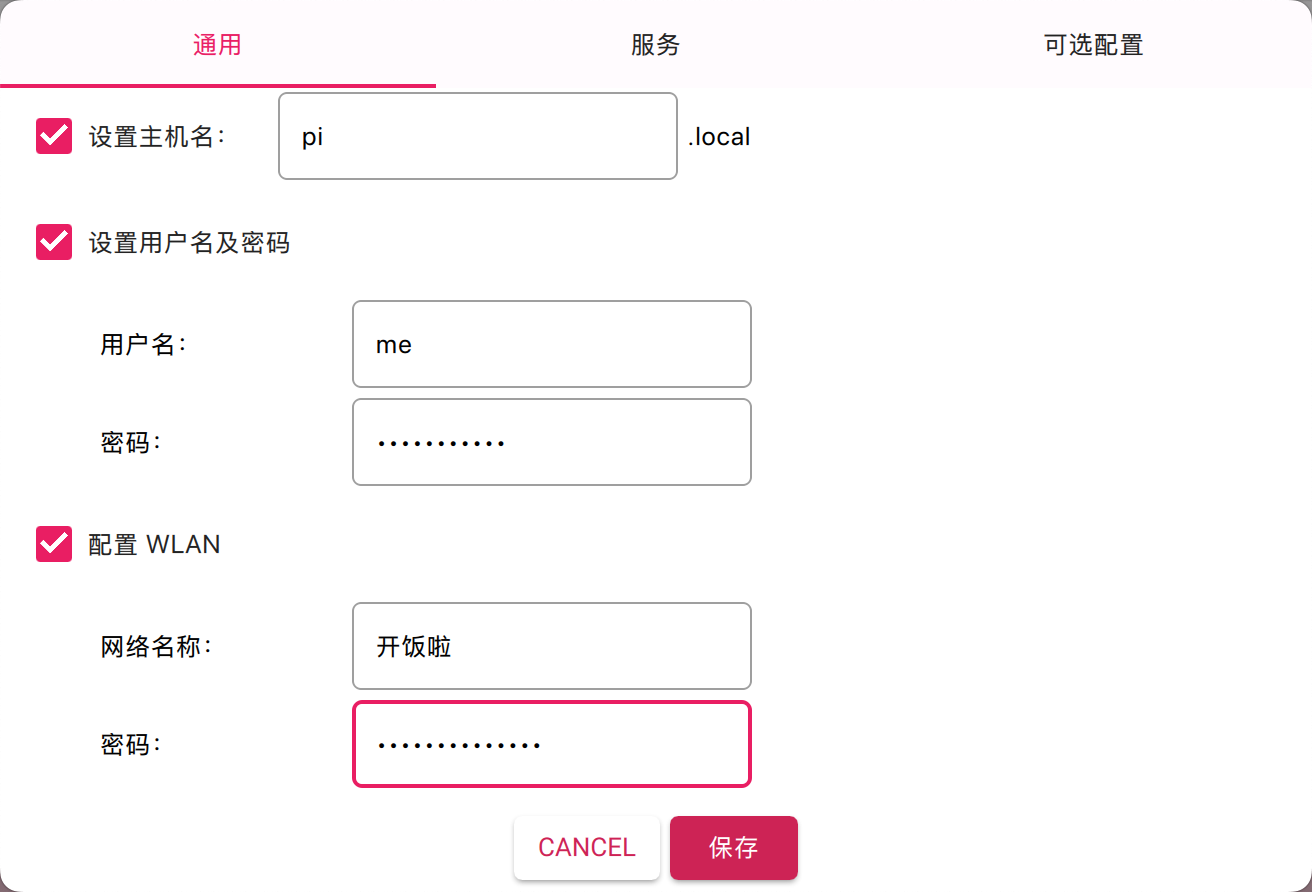 Fill in Wi-Fi info
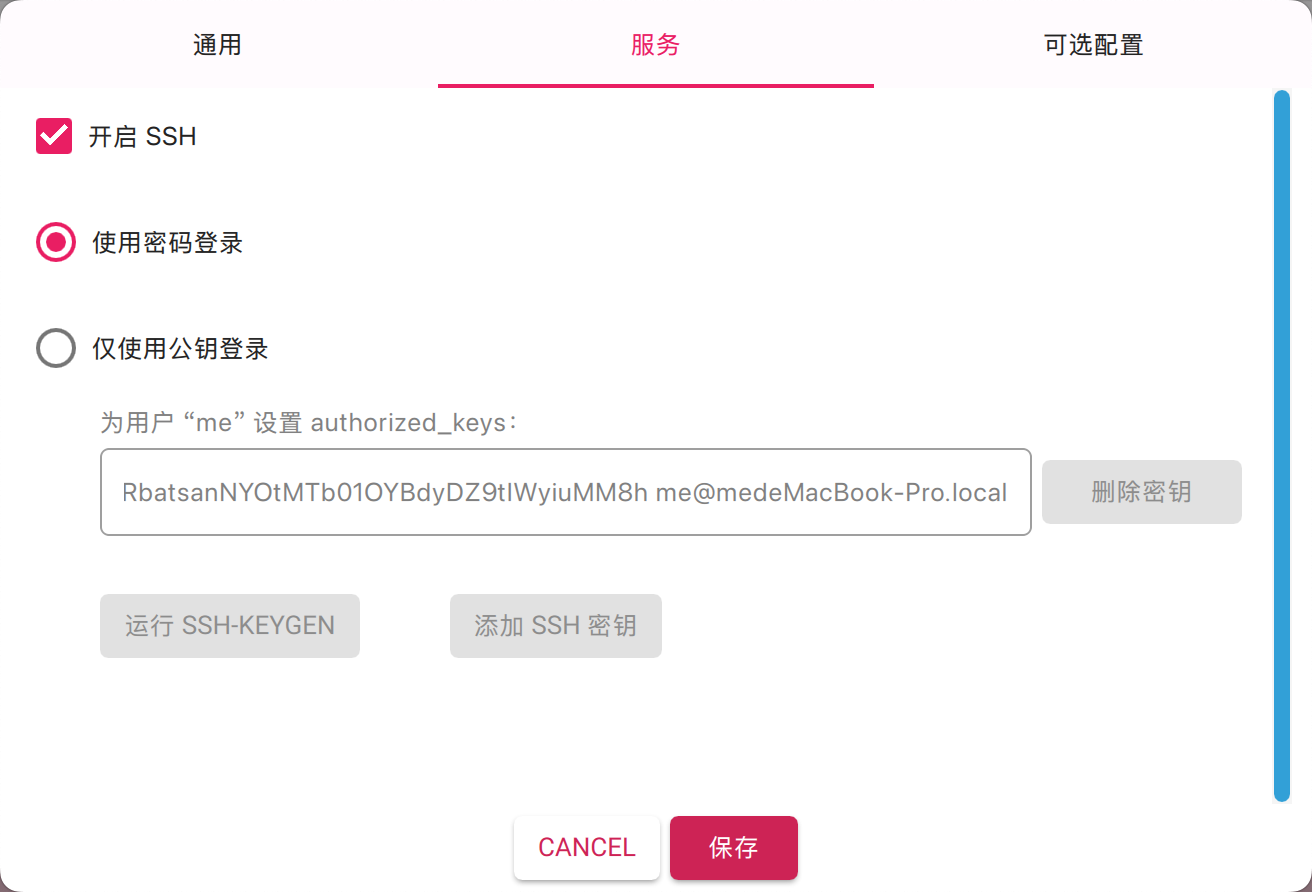 Enable SSH
I'd recommend also setting and remembering the hostname, so that later on, within the local network, you can reach the Pi directly by name instead of having to remember its IP address. Once configuration is done, you can flash the image. After flashing, plug the SD card back into the computer with a card reader (my computer is a MacBook Pro running macOS 15.3.1, hereafter "Mac"), locate the config.txt file in the root directory of the SD card, and append a line at the end (the current last line is [all]):
dtoverlay=dwc2
That completes the image-flashing step.
Network Interface Configuration
Now we can insert the SD card into the Pi and then plug the Pi into the Mac via USB. The Pi will power on and boot up, and since we've already configured Wi-Fi, it should connect to the network successfully. At this point, connect the Mac to the same network, and we can SSH into the Pi via ssh me@pi.local. Alternatively, you can look up its IP on the router and SSH via IP.
Next, on the Pi side, run
sudo modprobe g_ether
sudo ip link set usb0 up
sudo ip addr add 169.254.7.11/16 dev usb0
After running this, use ifconfig to check, and you'll find an extra network interface named usb0, with its IP set to 169.254.7.11. This is a reserved private IP; you can set it to whatever you like, and if you have no special preference, feel free to just copy it as-is.
After a short wait, switch to the Mac side, go to "System Settings" → "Network". Normally, a new RNDIS/Ethernet Gadget service will appear and will already be automatically connected. Click "Details" and you'll see it's been assigned an IP via DHCP; change this to manual mode with IP 169.254.7.1, leaving the router field blank. In principle this IP can also be customized, but again, if you have no special preference, just copy it directly.
Switch back to the Pi side and run ping 169.254.7.1. If the ping succeeds, it means the Pi and the Mac have formed a small local network over USB, with the Mac's IP being 169.254.7.1 and the Pi's IP being 169.254.7.11. On the Mac side, you can also connect to the Pi via ssh me@169.254.7.11.
Starting the Service
However, this network interface configuration is currently one-off — it disappears on reboot. We need to configure it as a service that starts automatically on boot, so that afterward, even without any network, we can still connect to the Pi via USB and ssh me@169.254.7.11. This is our ultimate goal.
On the Pi side, create /usr/local/bin/usb0.sh:
#!/bin/bash
sudo modprobe g_ether
sudo ip link set usb0 up
sudo ip addr add 169.254.7.11/16 dev usb0
nohup ping -c 100 169.254.7.1 > /var/log/usb0_ping.log 2>&1 &
exit 0
Then sudo chmod +x /usr/local/bin/usb0.sh, and create /etc/systemd/system/usb0.service as well, with the contents:
[Service]
Type=oneshot
ExecStart=/usr/local/bin/usb0.sh
RemainAfterExit=yes

[Install]
WantedBy=multi-user.target
Finally, run
sudo systemctl daemon-reload
sudo systemctl enable usb0.service
and that's it. From now on, whenever you plug the Pi into the Mac, once it finishes booting you'll be able to connect via ssh me@169.254.7.11, and if needed, you can connect to or switch Wi-Fi networks via sudo raspi-config.
Summary
As for the remaining steps of setting up the bypass router / transparent proxy, I'll leave those for you to explore on your own. This post is mainly meant to help you get the "portability" piece up and running — the rest is up to you.
Translated automatically with claude-sonnet-5; all equations are reproduced verbatim from the source. Copyright remains with the original author.